Casement Windows Screen Replacement
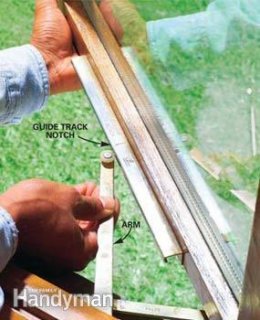
Photo 1: Inspect the old crank for damage
Inspect the old crank for wear. Worn and missing splines on the crank stud, stripped or broken gears, and worn-out crank arms mean you have to replace the entire crank operator.
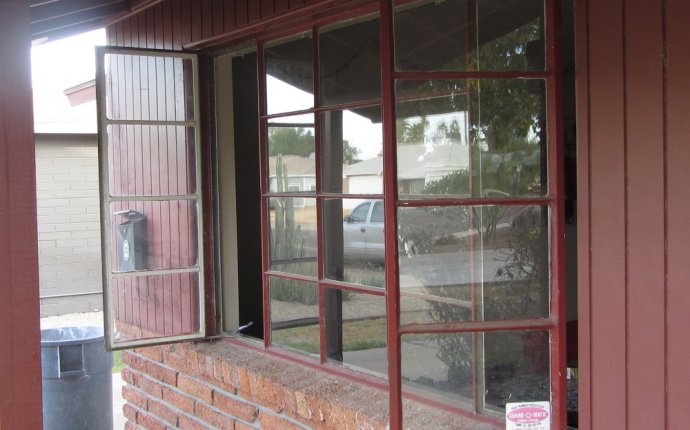
Photo 2: Release the window
Open the window until the crank arm guide bushing aligns with the notch in the guide track (use a locking pliers for a crank handle and push out on the window to help it open). Press down on the arm to free the bushing from the track, and then push out the window until the bushing clears the track.
Photo 3: Remove the trim and crank
Back out the trim screws and lift the casement cover off the window jamb. Remove all crank mounting screws and lift off the crank. Replace rusted or bent trim screws.
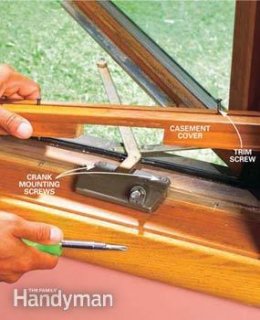 Photo 4: Buy and exact match
Compare the new operator with the old to make sure they match.
Photo 5: Install the new crank
Line up the new crank with the old holes. The old screw holes are often stripped. If so, stick a toothpick or two in them as filler and drive the screws. Then reattach the crank arm and casement cover.
If your window crank handle just spins when it's turned, or it can't pull in the sash far enough to engage the lock, chances are the gears are stripped and it's time for a new crank mechanism. Replacing the crank mechanism is simple. But finding a new crank may take some time. You can mail your old crank to some replacement hardware specialists and you'll get back a match (Photo 1). The cranks can be expensive, but they may be a bargain if the overall condition of the window is still good.
Start by inspecting the old crank operator and handle for wear. If the teeth are missing inside the crank handle, simply replace it (at home centers and full-service hardware stores). But if the operator has broken or worn parts (Photo 1), replace the entire operator mechanism.
Your operator may vary slightly from the one we show. However, the replacement process is similar. The first step is to disconnect the crank arm from the guide track. Take out the screen and crank the window open until the plastic guide bushing aligns with the guide track notch (Photo 2).
Next, look for trim mounting screws inside the screen track. Unscrew them to remove the casement cover and access the crank innards (Photo 4). If there aren't any trim screws, the casement cover is probably nailed or stapled in place. Slide a stiff putty knife between the window jamb and casement cover. Carefully pry up the casing so you don't damage the wood parts.


